Hardware, LEDs and charging
The device end
All controls and indicators are on the device end face.
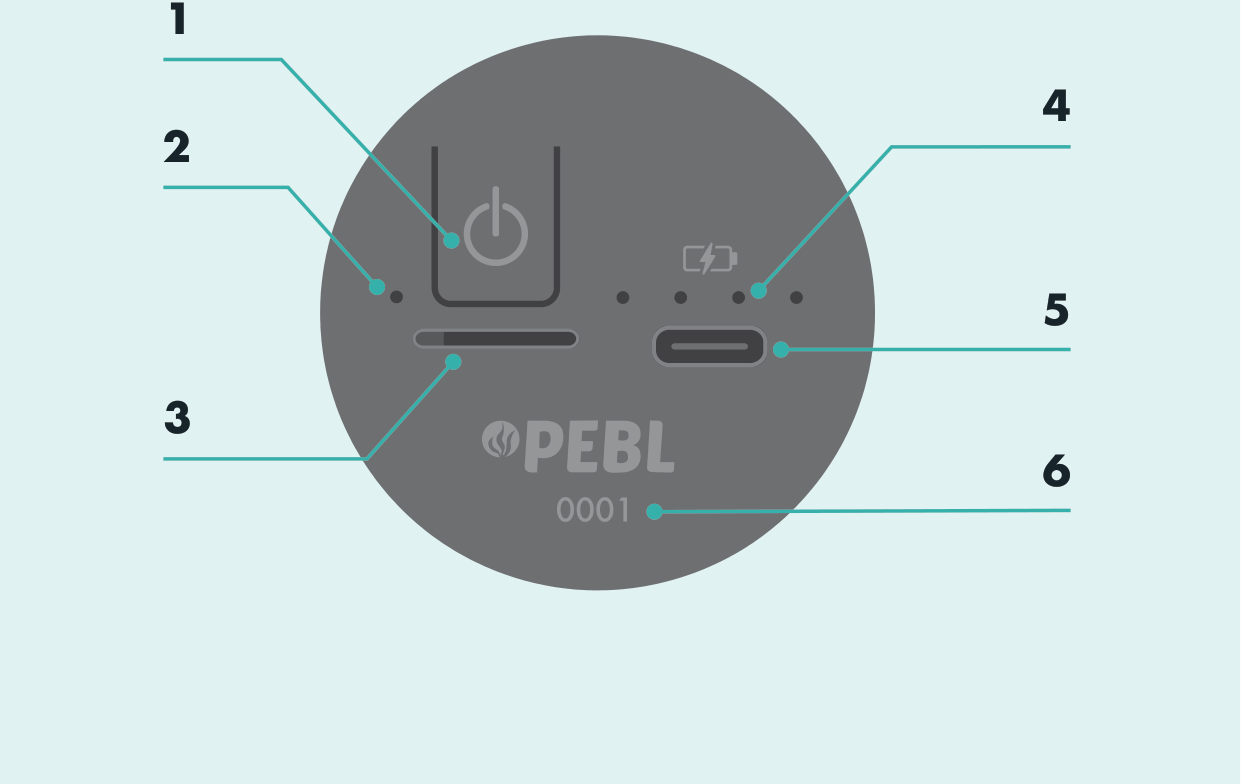
- Power button
- Device status LED
- SD card slot
- Charge status LEDs
- USB-C charge port
- Serial number
Power on and off
Press and hold the power button for 5 seconds to turn the SubCam on or off.
Status LED
The device status LED shows whether the SubCam is on and whether it has been configured.
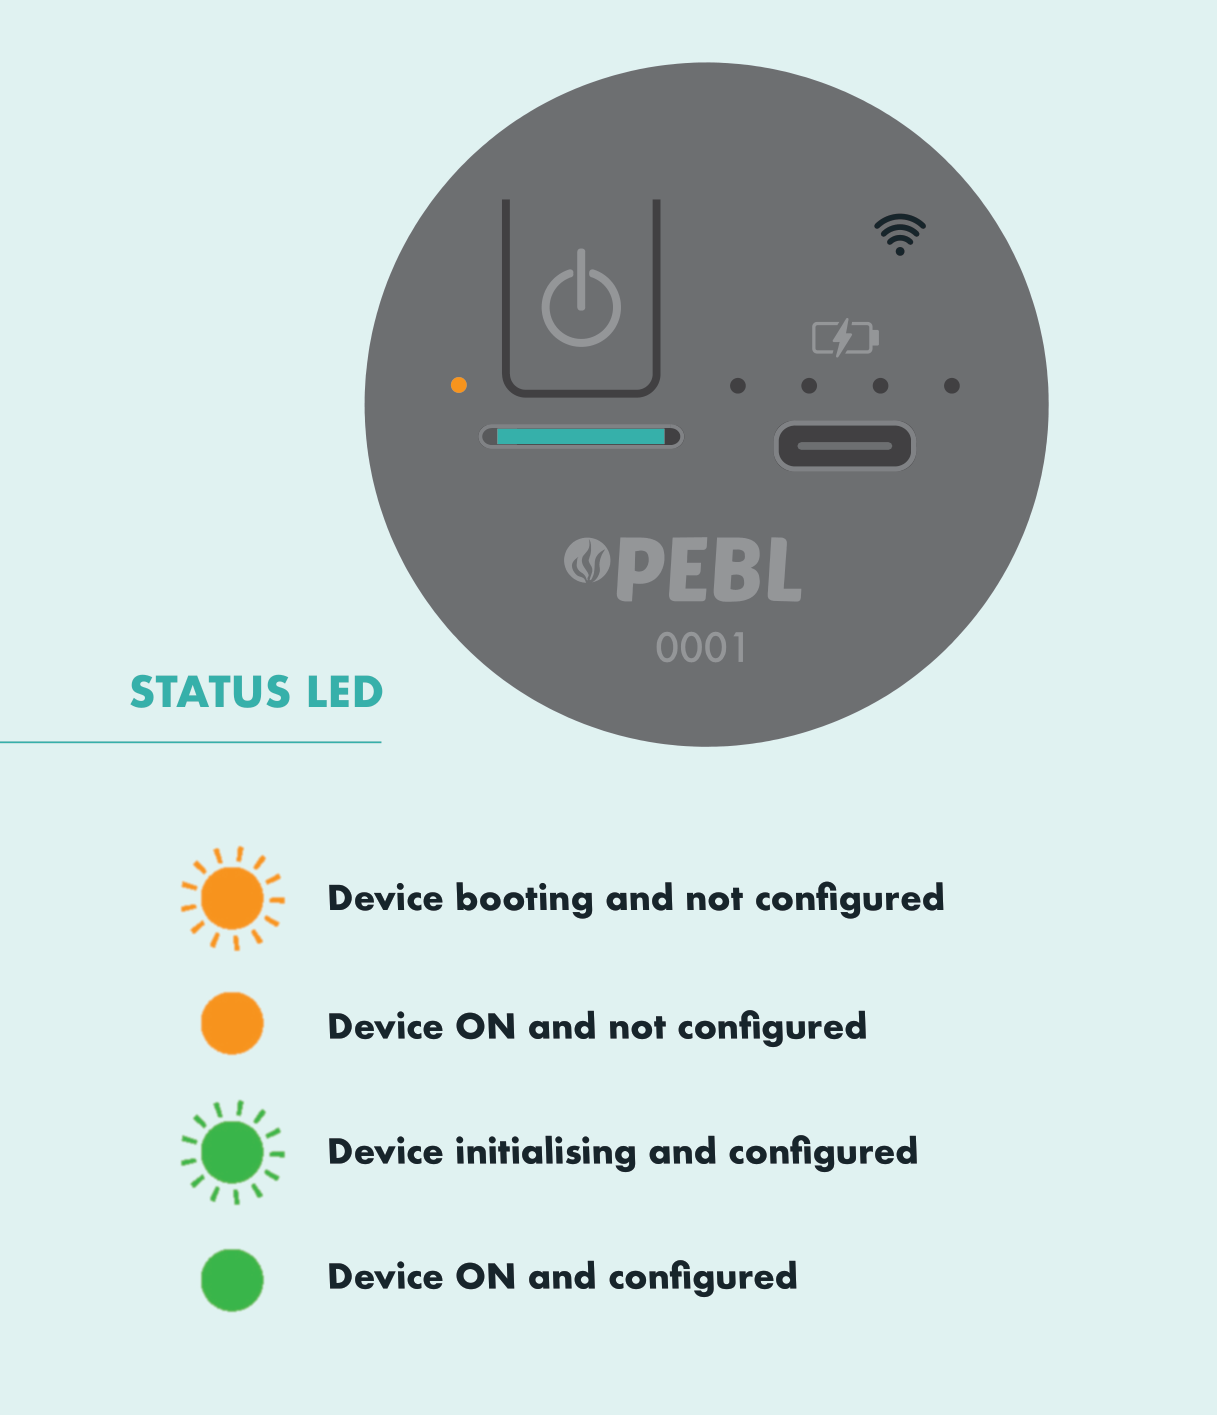
| Status LED | Meaning |
|---|---|
| Orange, pulsing | Device booting, not configured |
| Orange, steady | Device on, not configured |
| Green, pulsing | Device initialising, configured |
| Green, steady | Device on, configured |
Charging
Plug the supplied PEBL charger into a mains socket and the USB-C cable into the SubCam.
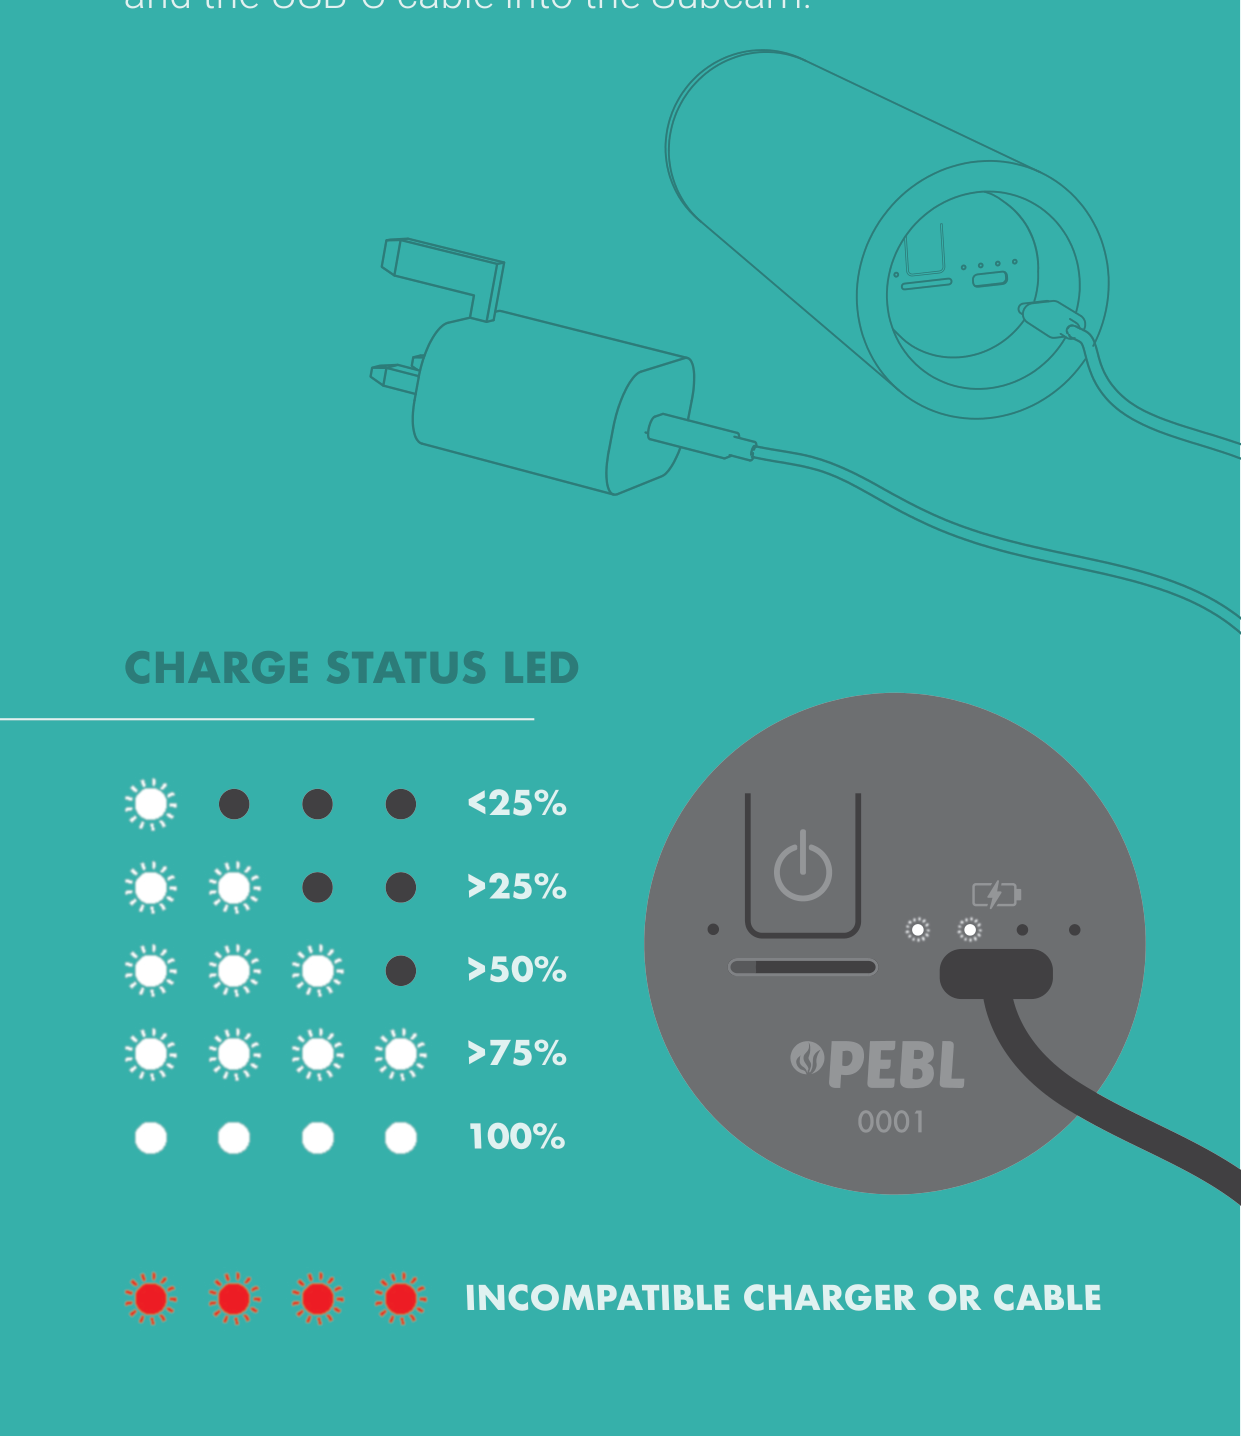
| Charge status LEDs | Battery level |
|---|---|
| 1 LED pulsing | < 25% |
| 2 LEDs lit | > 25% |
| 3 LEDs lit | > 50% |
| 4 LEDs lit | > 75% |
| 4 LEDs steady | 100%, fully charged |
| 4 LEDs flashing red | Incompatible charger or cable |
warning
Use the supplied 9V USB-C PD charger and cable. A flashing red charge LED means the charger or cable is not compatible.
A full charge takes about 4 hours. See the Specification for battery and charging details.